

Parsec Installation Guide
Step-by-step tutorial on how to install and use Parsec for remote desktop access
Before you begin: You will need DeskIn to control your rented Mac during the Parsec installation process. DeskIn allows you to remotely access the Mac to download, install, and configure Parsec.
After setup: Once Parsec is properly installed and configured on your rented Mac, you can use Parsec for all future connections and DeskIn will no longer be needed.
⚡ Fastest Performance: Parsec provides the best possible performance and lowest latency because it creates a direct connection between your computer and the rented Mac.
⚠️ Network Requirements: However, this requires UPnP (Universal Plug and Play) to be enabled on your router, which might not work in all network environments.
What is P2P (Peer-to-Peer)?
- • Direct Connection: Your computer connects directly to the rented Mac without going through external servers
- • Maximum Speed: No middleman servers means faster data transfer and lower latency
- • Better Quality: Direct connection allows for higher resolution and smoother performance
- • Network Dependent: Requires both networks to support direct connections (UPnP)
When Parsec Might Not Work:
- • Corporate networks with strict firewalls
- • Public WiFi networks (hotels, cafes, airports)
- • Routers with UPnP disabled for security reasons
- • Some ISPs that block P2P connections
- • Networks behind multiple NAT layers
💡 Alternative: If Parsec doesn't work due to network restrictions, try DeskIn instead. While not as fast as Parsec, DeskIn works through relay servers and is more compatible with restrictive networks.
1. Go to parsec.app/downloads
2. Select your operating system (Windows, macOS, or Linux)
3. Download and run the installer or (Windows only) download the portable version for non-admin users
The Parsec download page will automatically detect your operating system and show the appropriate download button.
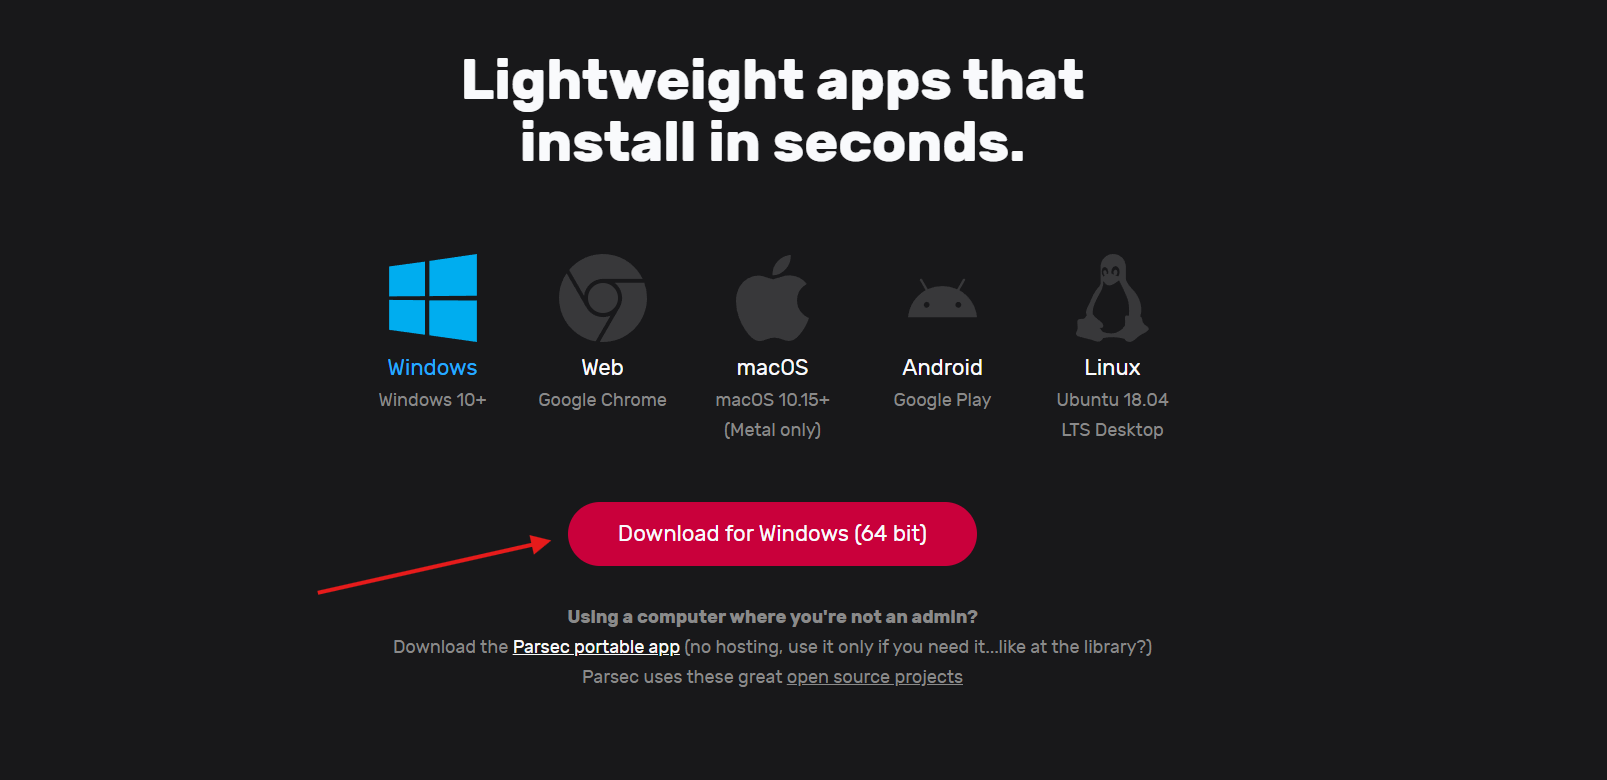
Tip: Make sure to download the client version, not the host-only version. For Windows users without admin rights, use the portable version.
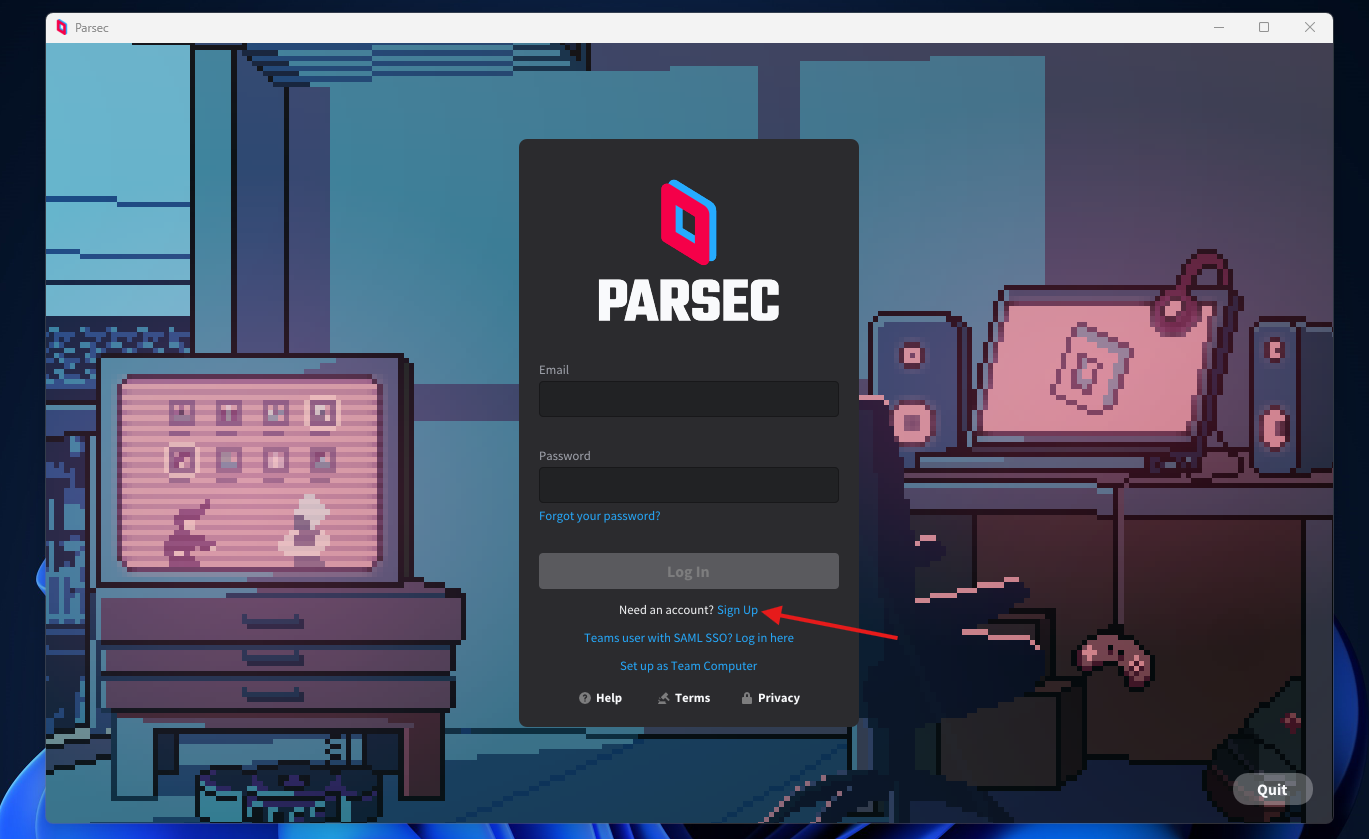
1. Launch the Parsec application after installation
2. Click "Sign Up" to create a new account (as shown in the screenshot)
3. Enter your email address and create a secure password
4. Verify your email address when prompted
The Parsec login screen will appear when you first launch the application. You can either sign in with an existing account or create a new one.
Download Parsec for macOS
1. On your rented Mac, open Safari or your preferred browser
2. Navigate to parsec.app/downloads
3. Click "Download for macOS" to download the .pkg installer file
Note: The download will be a .pkg installer file (typically around 3MB)
Install and Configure Parsec
1. Double-click the downloaded .pkg file to start the installer
2. Follow the installation wizard prompts
3. Enter your administrator password when prompted
4. Launch Parsec from Applications or Spotlight search
5. Sign in with your Parsec account or create a new one
Security Note: macOS may show a security warning for unidentified developers. Go to System Preferences > Security & Privacy and click "Open Anyway" if needed.
Enable Hosting and Set Permissions
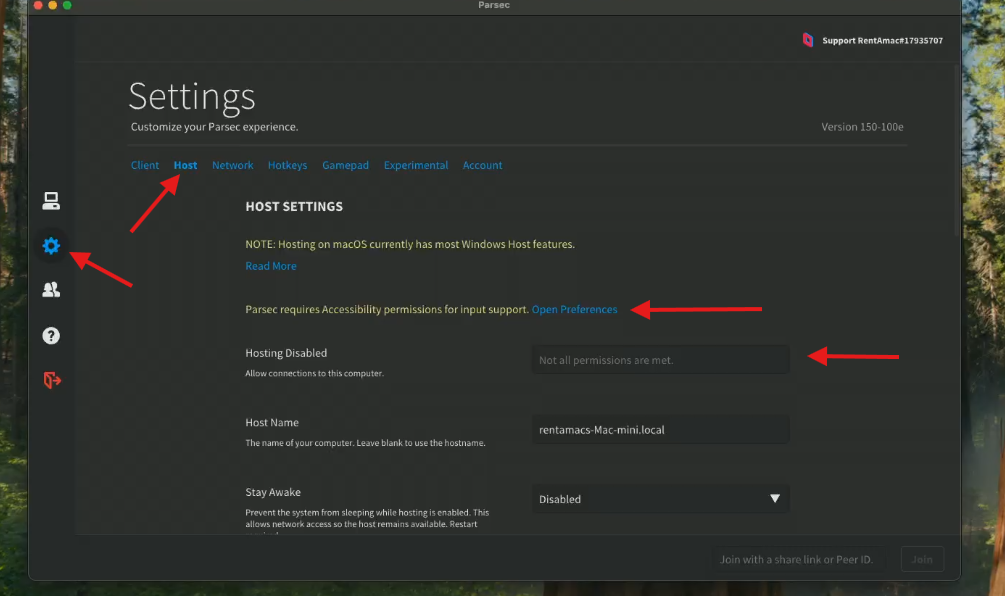
1. In Parsec, go to Settings (gear icon) and click the "Host" tab
2. Grant necessary permissions when prompted:
- • Screen Recording permission
- • Accessibility permission
- • Input Monitoring permission
3. Enable hosting by allowing connections to this computer
Important: Keep Parsec running for remote connections.
Share Screen and Copy Connection Info
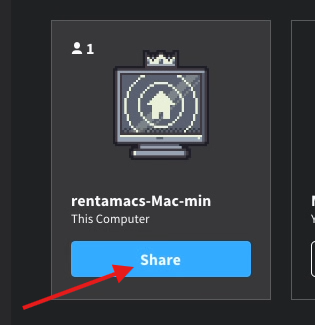
1. Once hosting is enabled, your computer will appear in the main Parsec interface
2. Click the blue "Share" button on your computer card
3. Copy the share link that appears
4. Note the computer name (e.g., "rentamacs-Mac-mini") for identification
5. The crown icon indicates this is your host computer
Once these steps are completed on your rented Mac, you can connect to it using the steps below.
Important: Perform these steps on your own computer (not on the rented Mac). This is where you'll connect FROM to access your rented Mac.
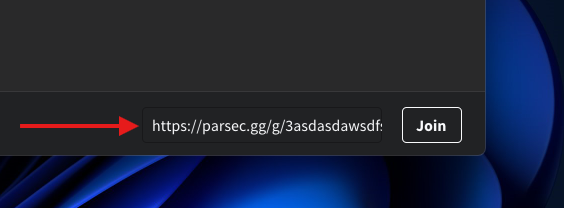
1. On your own computer, open the Parsec application and make sure you're logged in
2. Paste the share link into the connection field and click "Join"
Approve Connection on Host Mac
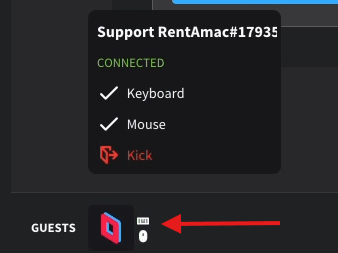
On the rented Mac: When someone connects, you'll need to approve the connection and ensure permissions are enabled.
1. Look for the connection notification in the bottom-left corner of Parsec
2. Click on the guest connection indicator (shown with red arrow) and approve the connection
3. Ensure both "Keyboard" and "Mouse" show checkmarks (✓)
4. If either shows an X, click on them to enable the permissions
5. The connection status should show "CONNECTED" in green
Troubleshooting: If you can't connect, make sure your rented Mac has Parsec installed and configured properly. Contact support if you need assistance with the setup.